Solution Suggestions
Working with Images
Images in EyeAutomate are small screen captures. By default, the target location or area is at the center of the image.
-
Use the Properties dialog to change the target location for commands like Move or Click.
-
You can also define a target area by clicking and dragging the mouse. A target area provides more precision than a target location and can improve script reliability. Both the target area and the surrounding area must be verified for the match to be accepted.
⚠️ Choosing an area that is too large or imprecise may negatively affect image detection.
For Check commands:
-
Use the Properties dialog to select the area to check.
-
Again, both the check area and the surrounding area must match.
-
If no check area is defined, EyeAutomate will auto-select a target area.
For Capture, Read, or Region commands:
-
By default, the entire screen capture is used.
-
You can adjust the selection using the blue rectangle to capture only a smaller, relevant area.
You can also adjust the ConfirmationLevel to control image detection sensitivity:
-
Increase the value if EyeAutomate mistakenly finds a wrong image.
-
Decrease the value if EyeAutomate cannot detect an image that should match.
Pausing the Script
Scripts often need to wait for UI elements to appear before continuing.
Types of Delay:
-
Fixed Delay
Use a fixed number of milliseconds. This is simple but unreliable:-
Too long → slows the script.
-
Too short → might not wait long enough.
-
-
Wait for Screen Stability
Use theWaitcommand (without parameters) to:-
Pause until the screen becomes stable.
-
Ignore small visual changes (less than 1000 pixels).
-
This is a quick solution but may not always be reliable.
-
-
Wait for an Image (Most reliable)
Wait until one or more specified images appear on screen. The command proceeds once any of the images are detected.
Recovering from a Failed Command
To make scripts more robust, EyeAutomate allows recovery steps for failed commands.
Manual Recovery
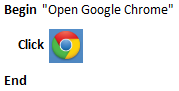
Use the Begin and End commands to define a block of steps that can be performed either automatically or manually if something goes wrong.
Example:
Automatic Recovery
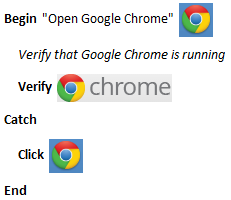
Use the Catch command inside a Begin/End block to attempt automatic recovery. If the Catch block also fails, the steps can still be handled manually.
Example: Starting Google Chrome from the Start menu if not already open.
-
You can use multiple Catch commands inside a single Begin/End block.
-
You may include images in manual instructions to make them easier for the tester to follow.
Capturing Effective Images
Images are central to EyeAutomate scripts. For reliable performance:
-
Click on unique visual elements (e.g., text or icons), not on blank areas or near similar content.
-
Recapture images if you experience recognition issues.
-
Larger images are more reliable but take longer to process.
-
Record scripts slowly — fast recording may result in poor-quality captures.
Using Multiple Sets of Images
The ImageFolder parameter lets you run the same script with different sets of images, ideal for supporting:
-
Multiple operating systems
-
Varying screen resolutions
To switch image folders:
-
Use the Set Image Folder option in the Settings menu.
-
Recapture all images after switching OS or resolution.
-
Create a test suite and run the same script with different folders.
Example:
Call "ImageFolder=images" "scripts/calc1.txt"
Call "ImageFolder=images2" "scripts/calc1.txt"