Features
Image Recognition AI
EyeAutomate supports image recognition of small screenshots. The image is first analyzed and broken down into many smaller areas of interest. The image to the left is the actual image, and the image to the right contains the image analysis.
The Eye finds the best match closest to the current location.
The red target area needs to be confirmed by the blue areas in the image. A target is confirmed if at least ConfirmationLevel percent of all areas are found. The areas need to be located relative to the target area to be valid.
Vector-Based Image Recognition
EyeAutomate supports both pixel-based and vector-based image recognition.
Switch to vector-based image recognition using the Recognition command, as shown in the example below:
Recognition Vectors
Vector-based recognition is much less sensitive to zoom and rendering details. For example, a script created in Chrome with 100% zoom will most likely still work in the Firefox browser using 150% zoom.
Make sure to include some vertical or horizontal lines in the images when using vector-based image recognition. The example below is a good illustration:

Either method is used by default and requires either a vector or a pixel match. Both require that both vectors and pixels match the target.
Multi-Threaded Image Detection
The Eye uses one thread per available CPU core when finding an image. You can reduce the number of threads used with the CpuUsage command.
Multi-Screen Support
EyeAutomate can capture images and run scripts on any monitor connected to the machine. Note that using multiple screens may reduce the execution speed.
Manual Tests
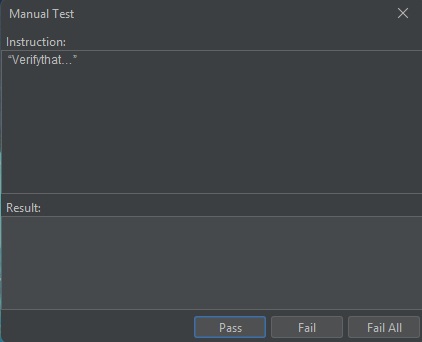
Some steps in the test case might be difficult to automate. In EyeAutomate, you can create manual tests by adding an empty step. EyeAutomate will display the Manual Test dialog containing the manual test instruction. The user selects the Pass, Fail, or Fail All button after attempting the instruction. The Fail All button will also fail any other manual test dialogs that might appear. A user may also enter a comment in the Result field.
Begin “Verify that…”
End
Manual Recovery
failing the test when manual recovery is enabled. Semi-automated tests are less fragile than fully automated tests. The user may, for example, be instructed to manually click on a button that EyeAutomate failed to find.
See the ManualRecovery and Begin commands for more information.
Automatic Recovery
To make a script even more reliable, it is possible to insert one or more Catch commands between the Begin and End commands. The commands between a Catch command and the next Catch or End command will be executed automatically before recovering manually if the script fails before reaching the Catch command. You may insert any number of Catch commands, and EyeAutomate will try them one by one until one of them is executed without problems.
See the Catch command for more information.
Encrypted Text
Insert encrypted text using the Insert Encrypted Text option in the Script menu. Encrypted texts are automatically decrypted by the Type and Paste commands. An encrypted text must be provided as a separate parameter to the command to be decrypted, for example:
Type “007a280819d700”