4. Introduction
Color indicators
- Green – Web element is set as a check.
- Blue – Previous action preformed on hint box.
- Red – Registered issue with the marked text/web element.
- Yellow – Indicates a change or a user decision is needed.
Getting Started
- Click Start on the toolbar.
(Yellowed buttons indicates active settings on toolbar.)

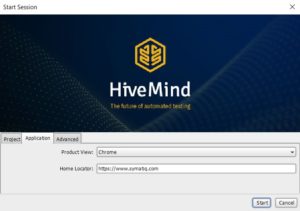
- In the Product input field create a new test suite by typing the name.

- In the Project tab, choose the current Product Version and Tester Name (optional).

- In the Application tab, choose the Product View (webdriver) and Home Locator (URL) as the starting position for the website.
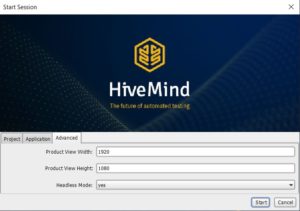
- In the Advanced tab, choose the visual resolution to be displayed in HiveMind.
| Headless Mode | Feature |
|---|---|
| Yes | Browse the website in HiveMind |
| No | Browse the website in a web-browser. |
- As a final step click Start.
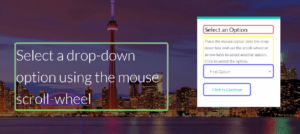
Using HiveMind
- Hover the mouse pointer constantly over a selected webelement.
- Scroll through available options with the mouse wheel.
- After choosen option, press left mouse button.
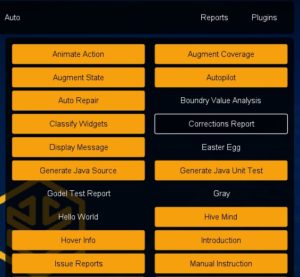
Enable and Disable Plugins
- Click on Plugins from the toolbar, opening the submenu.
- Click on available plugin to activate (turns yellow) in the HiveMind framework.
File Directory
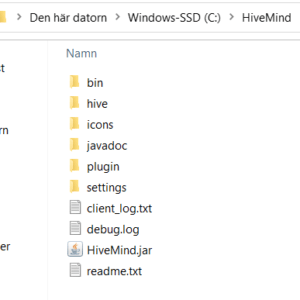
Access files and customize the HiveMind framework from your setup location.
- bin – Drivers and multilocator
- hive – Directory for each session with files of recorded states, previous state structures and session properties.
- icons – Graphic systemfiles
- javadoc – Documentation of HiveMind system functionalities.
- plugin – Location of included customizable and personal developed plugins.
- settings – HiveMind systemfiles settings.