Remote Connection
EyeStudio and the EyeServer can be connected to make it easier to develop and run scripts on a remote machine.
Enable a remote connection by selecting the Remote Connection option in the Remote menu. Enter the address and port to the EyeServer to connect with.
Enter the address to the remote server using the following format:
http://[server address]:[port]
To, for example, use the server on your local machine:
http://localhost:1234
There are three new options options available from the File menu when the remote connection is enabled:
- Remote Dashboard
- Remote Window
- Synchronize
Remote Dashboard
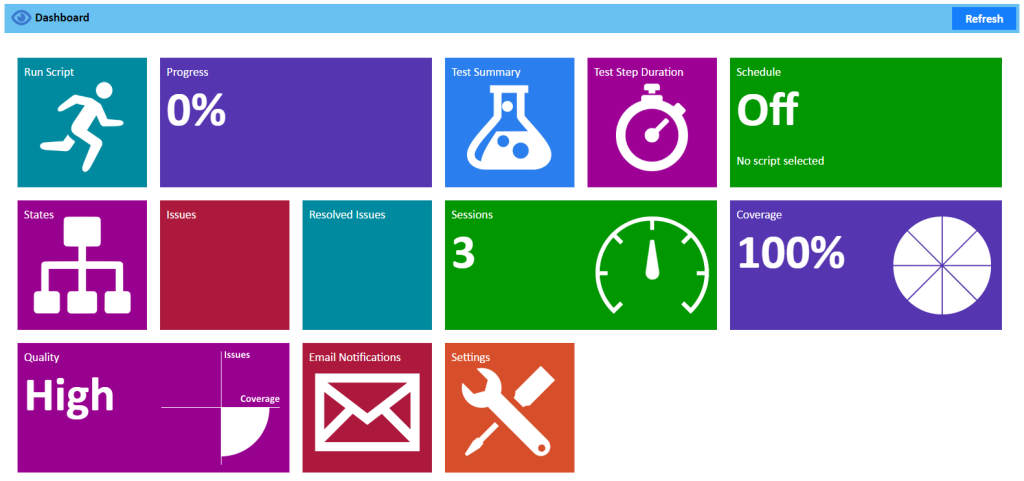
The dashboard provides easy access to most of the reports and features of the EyeServer. Use the dashboard to run scripts, follow the progress, view test results, and adjust settings.

Open the dashboard using the URL:
http://[server address]:[port]
for example:
http://localhost:1234
Remote Window
The Remote Window makes it possible to view and remote control a machine that has a running instance of the EyeServer.

Make sure that you have enabled a Remote Connection from the Settings menu.
Open the Remote Window from the Remote Window option in the Remote menu in EyeStudio.
Send commands to the remote machine using the mouse or keyboard.
Selecting any of the the Run options in EyeStudio will synchronize and run the script on the remote machine.
Images will now be captured from the Remote Window instead of the entire screen. Note that images are always captured correctly regardless of the size of the Remote Window.
Recording a script is performed by using the mouse and keyboard inside the Remote Window. Note that a script can be recorded on all platforms.
Synchronization
Managing scripts and images can be difficult in a larger team. This problem can be handled by using a version control system. Teams that do not have a version control system in place or find it difficult to use such a system can benefit from using the file synchronization feature in EyeStudio.
Make sure that you have enabled a Remote Connection from the Remote menu.
Synchronize with other clients using the Synchronize option in the Remote menu. All changes since the last synchronization will be downloaded and uploaded.
No files are deleted only inserted or replaced. Files that are overwritten on the EyeAutomate Web Service side is first backed up by adding the “.old” extension.
Clients that are added to the synchronization should have a similar starting point, for example a clean installation of EyeAutomate. A newly added client will receive a lot of changes when performing the first synchronization.
Note that the file synchronization will not work properly when running EyeStudio located in the same folder as the running EyeServer.
File Synchronization Filter
The “filter.properties” file is used, on the client side, when determining what local files to synchronize with the server. This file contains a list of regular expressions of what to include.
All files in the EyeAutomate installation is targeted for synchronization, by default. Change the RootFolder to synchronize that folder only.
Each row in the “filter.properties” file specifies one path that should be synchronized. The example below contains the default filter:
images/.*\.png
scripts/.*\.txt
data/.*\.csv